DOCS / Installation & Setup
Getting Started

Installation & Setup

A complete guide to installing ShowTime Player, activating your license, and initial configuration.

Step 01

Downloading the Installer

Always use the latest version of the software. You can also find the changelog in the downloads section.

  • Run Installer Download the file and run it. You will see the welcome screen.
  • System Dependencies To run AI analysis modules, the .NET Runtime is required. If they don't install automatically, use the link below.
Installation Screen
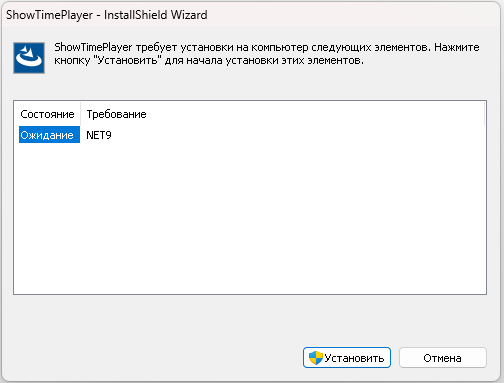
Installation window and components
Step 02

Licensing

After the first launch, the program will request activation. The license is tied to your PC's unique hardware ID (HWID).

Important: Credentials
Do not use Cyrillic characters or spaces in your login! We recommend using your email address as your login.
  • Registration Get a key via the website or Telegram bot @showbackbot.
  • Activation You will receive an email or message with the key. Copy the data into the program window.
Activation Window
Enter received data without extra spaces
Step 03

Access Verification

Upon entering a valid key, you will see a success message.

  • Common Mistake Accidental space at the end of the key or login when copying. Check characters carefully.
  • Binding Remember: the license is valid for one computer only. A new registration is required for another PC.
Successful Activation
Program is ready to use
Step 04

Interface & Settings

Access to main parameters is via the top menu. Here you can adapt the program to your needs.

  • Main Menu Click the menu icon in the top corner to open the options list.
  • Personalization In this section, you can switch the interface language or change the skin (theme).
  • Configuration Here you will find access to deep system settings.
Main Settings Menu
Menu for settings, language, and theme
Step 05

Audio Setup

Go to Settings -> Audio. The program supports **WASAPI** and **ASIO** drivers for minimum latency.

Attention: LTC Conflict
The sound card for Master Out (venue sound) and the card for LTC (timecode) must be **different** (or use different ASIO channels). Otherwise, loud digital clicks will be heard in the music.
  • Audio Output: Select the main device for sound output.
  • LTC Output: Configure a separate channel for transmitting the sync signal.
Audio Settings
Settings Tab: Audio Configuration
Step 06

File Library

On the same **Settings** tab, you can manage the location of your projects.

  • Default Path Documents > Showtimeplayer > SHOW
  • Customization You can change the show folder path if you store projects on an external drive or cloud.

Thank you for choosing ShowTime Player. For further setup, proceed to the next help sections.

Back to Help Menu
Library Settings
Library path configuration