DOCS / Obsidian Onyx / Connect Onyx Obsidian
Guide

Onyx Obsidian

Instructions for configuring connections for different versions of Onyx.

⚠️ Important: Check your Onyx Version

  • Versions 4.0 — 4.6 No setup required! ShowTime Player controls Onyx directly without additional protocols (OSC or Telnet are NOT needed).
  • Versions 4.10 and newer Mandatory Telnet setup is required. Please follow the instructions below.
Step 01

Enable Telnet in Onyx

For versions 4.10+, you must enable external control via the Telnet protocol.

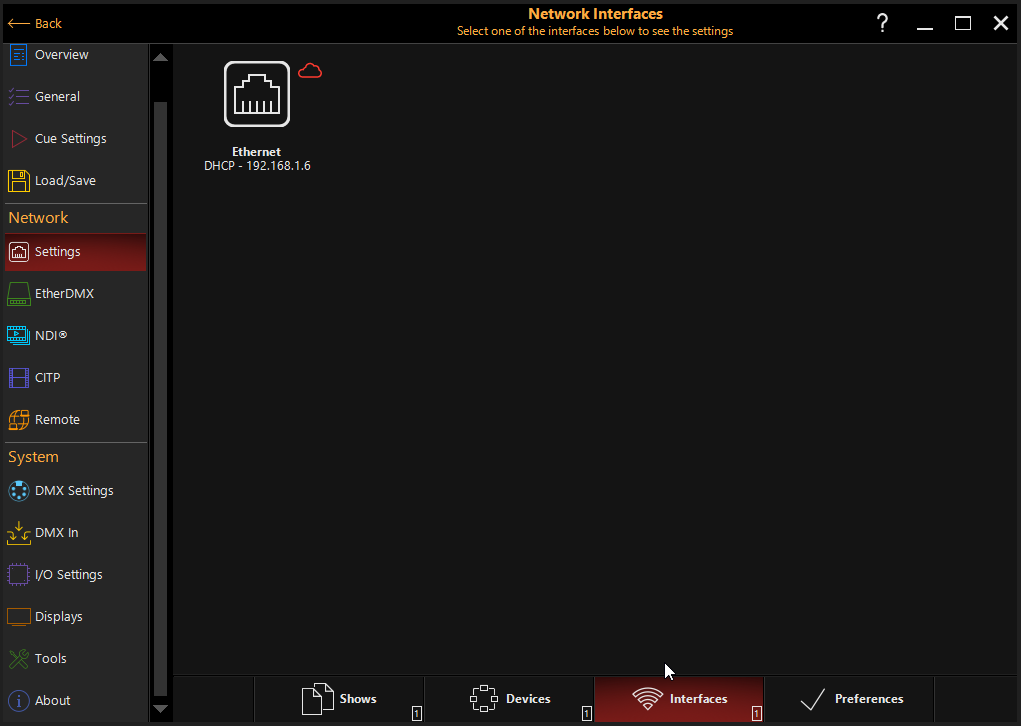
  • Main Menu Click the ONYX icon in the top left corner of the screen.
  • Menu > Remote Go to the "Menu" section, select "Remote," and open the Telnet tab.
  • Activation Enable Telnet on the standard port. Once enabled, exit the settings mode.
Onyx Telnet Settings
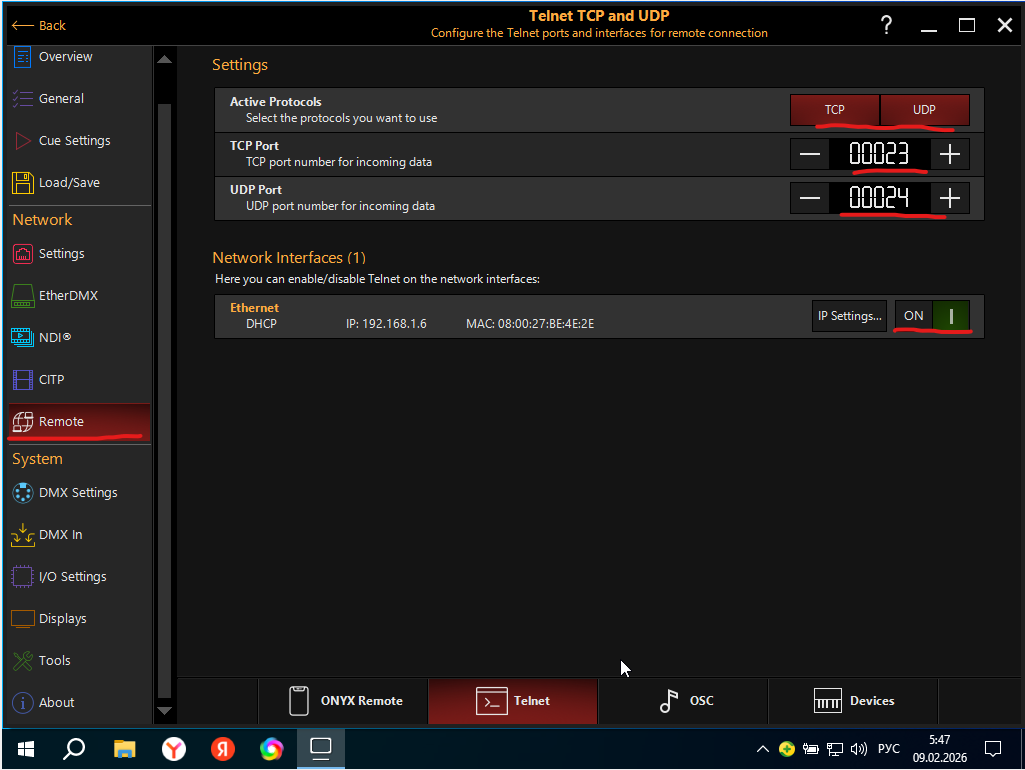
Enabling Telnet in the Remote menu
Step 02

Activate Plugin

Now you need to enable Onyx support within ShowTime Player.

  • Player Settings Open ShowTime Player and go to the settings menu.
  • Plugins Section Find the Onyx plugin in the list and toggle it to the ON position.
ShowTime Player Plugins
Enabling the Onyx plugin
Step 03

Connection Setup

After enabling the plugin, a new Onyx tab will appear. Go there to configure addresses.

  • Console IP Address If the player and Onyx are running on the same PC, enter 127.0.0.1. If on different devices, enter the console's actual IP.
  • Port Enter the Telnet port you specified in the Onyx settings (Step 1). The ports must match exactly.
Onyx Connection Config
Entering IP address and port
Step 04

Network Check (Remote)

If connecting to a remote computer or console, ensure you are using the correct IP address.

  • Where to find the IP? Go to network settings inside the Onyx console (Menu > Network Settings) to see the current device address (EtherDMX or Management IP).
Onyx Network Info
Checking console network settings
Step 05

Ready to Go

Final setup stage.

  • Restart Be sure to restart ShowTime Player. Ensure Onyx is already running.
  • Result After startup, you will see loaded Scenes, Cues, and Timecode Cues.
  • Usage You can now drag these elements onto the timeline, start playback, and verify the show.
Success! All set. Proceed to the next page of the manual.
Onyx Sync Success
List of loaded scenes and timecodes