Импорт в GrandMA2
Узнайте, как правильно добавить сгенерированную XML фикстуру с сайта showbackstage.ru в пульты серии GrandMA2 (гарантированная работа с версии 3.9.60, но поддерживаются и более старые версии).
1️⃣ Скачивание XML профиля
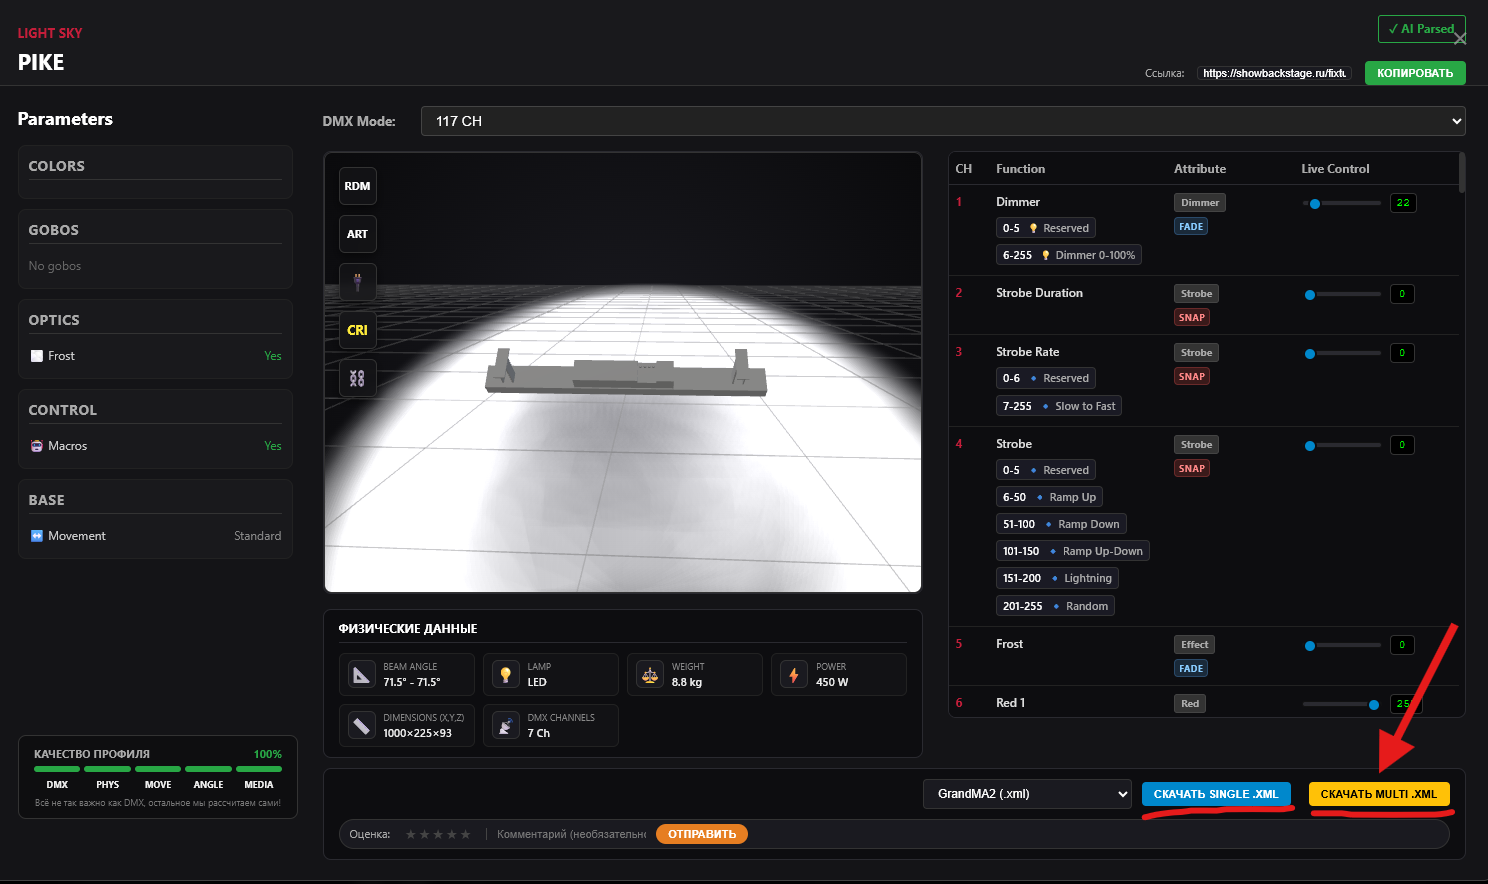
После успешной генерации, в модальном окне выберите проприетарный формат GrandMA2 (.xml) и нажмите кнопку скачивания файла (Multi или Single в зависимости от типа прибора).
2️⃣ Перенос файла на флешку
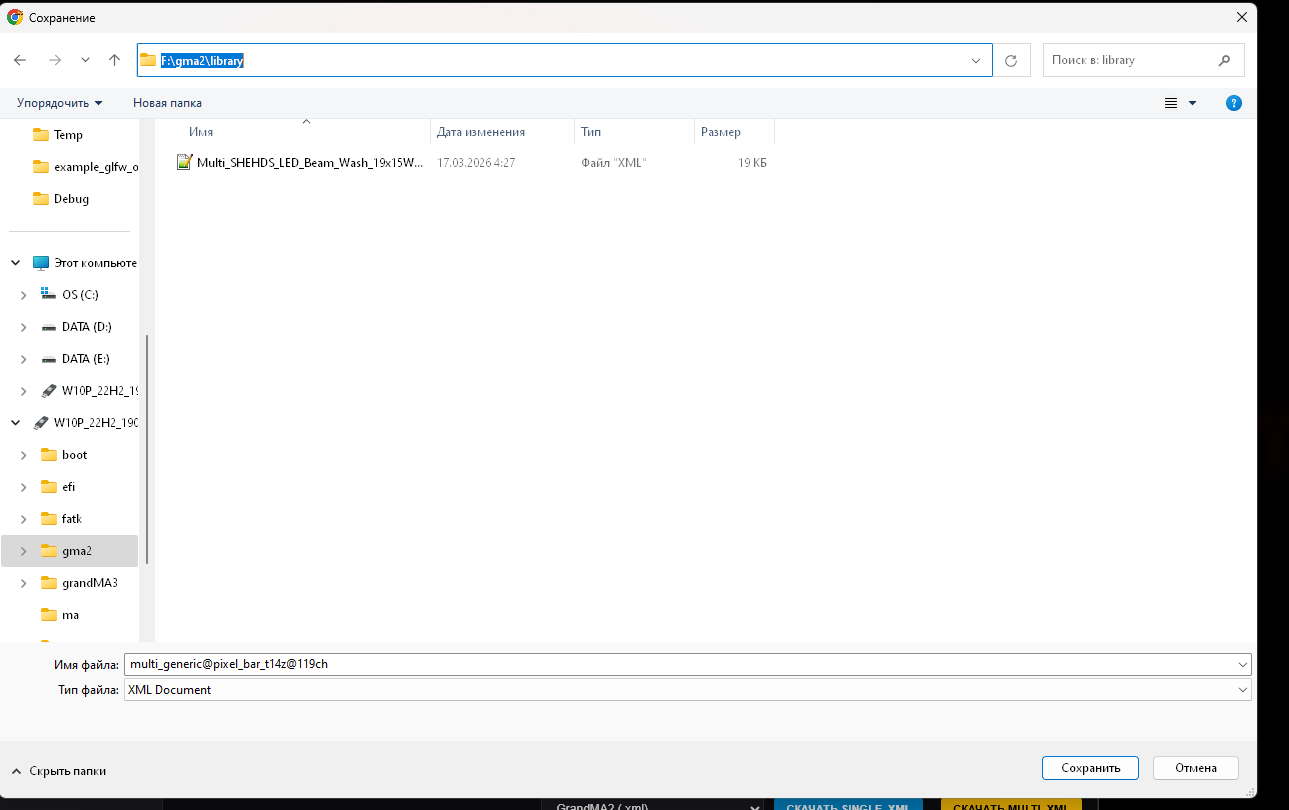
Скопируйте скачанный файл на вашу USB-флешку. Путь на флешке должен быть следующим:
Обычно пульт GrandMA2 (или onPC) сам создает эту структуру папок при первом подключении накопителя, но если её нет — просто создайте эти папки вручную.
3️⃣ Вход в меню Setup
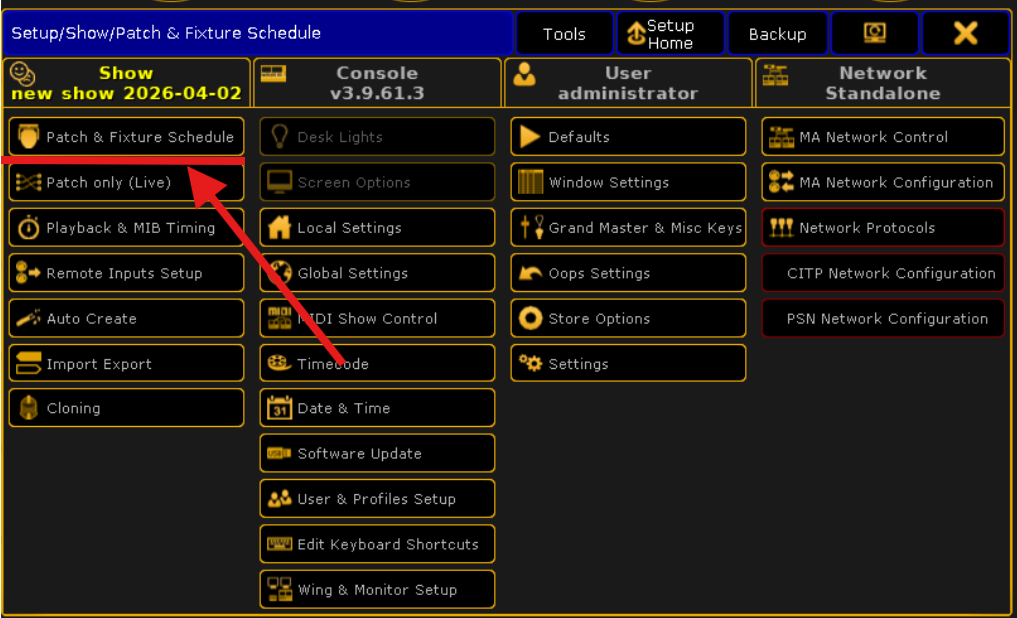
Вставьте флешку в пульт. Нажмите клавишу или экранную кнопку SETUP для входа в системное меню.
4️⃣ Создание слоя приборов
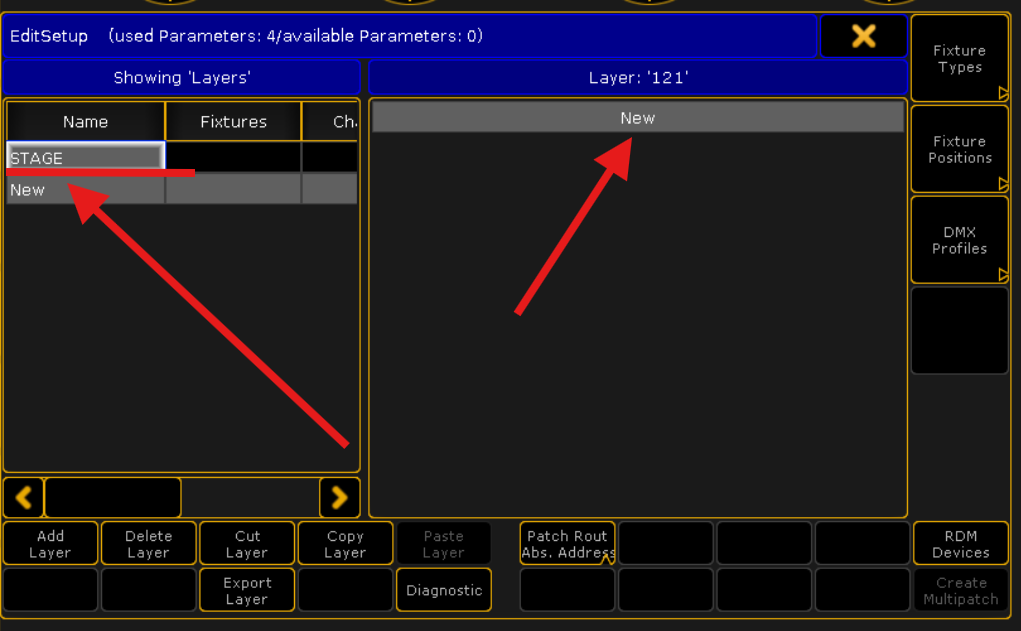
Перейдите в раздел Patch & Fixture Schedule. В левой части экрана создайте новый слой приборов (впишите имя в колонку Layer) или выберите существующий. Затем в правой части экрана нажмите кнопку NEW (или Add New Fixtures), чтобы открыть мастер добавления приборов (Fixture Wizard).
5️⃣ Добавление из библиотеки (From Library)
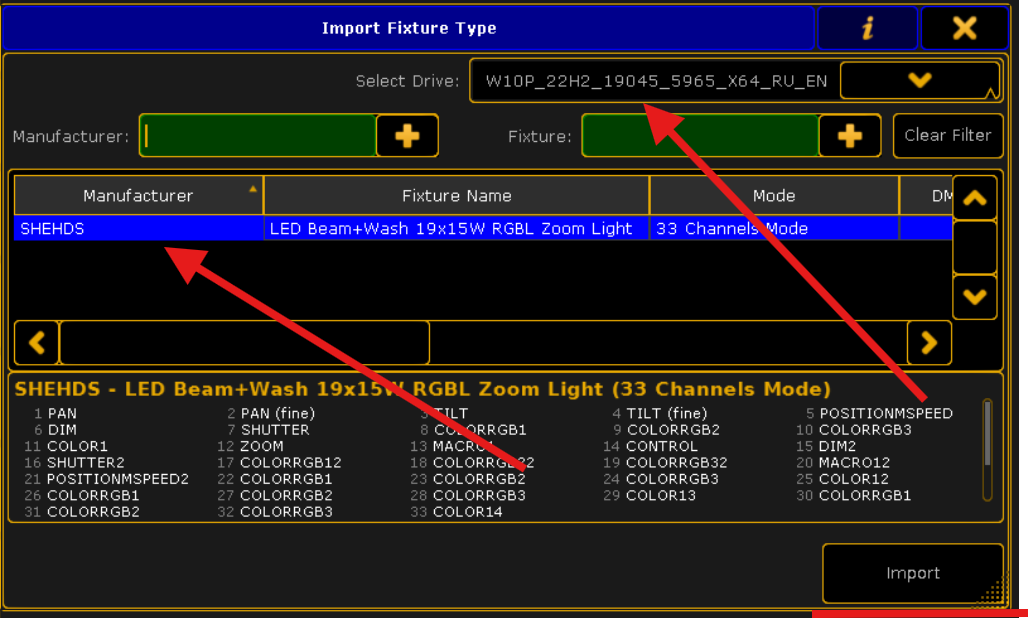
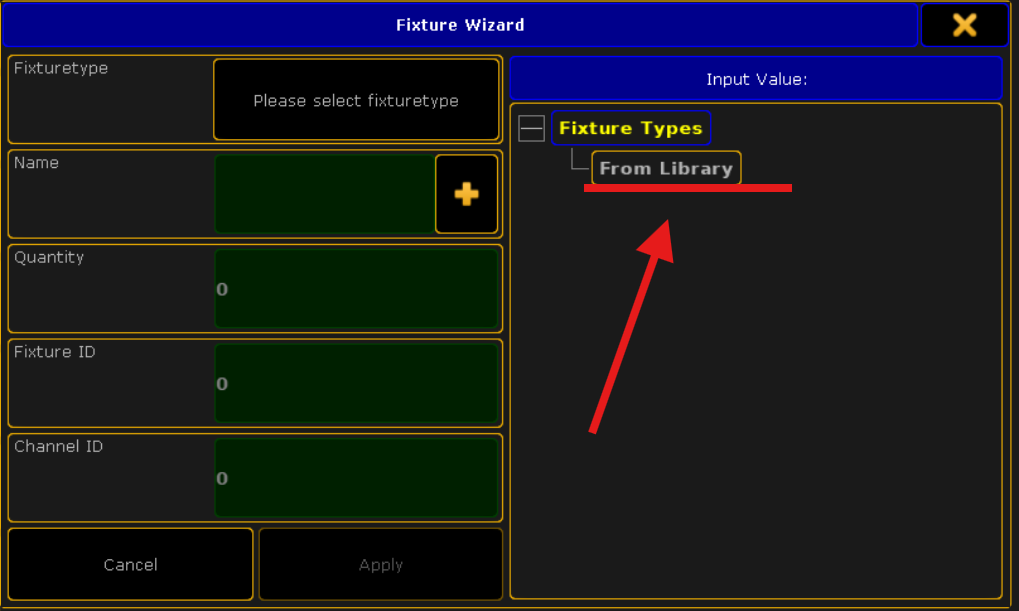
В открывшемся окне Fixture Wizard нажмите на кнопку From Library. Перед вами откроется библиотека профилей. Обратите внимание на кнопку накопителя в правом верхнем углу (обычно там написано Internal). Нажмите на неё и переключитесь на вашу USB-флешку. Найдите вашу фикстуру по производителю (Manufacturer) и названию, выберите нужный мод (DMX-режим) и нажмите Import.
6️⃣ Настройка и завершение патча
Вернувшись в мастер добавления, укажите количество приборов (Quantity), стартовый Fixture ID и нужный DMX-адрес. Нажмите Apply, чтобы добавить их в слой. Закройте окно Patch & Fixture Schedule крестиком в правом верхнем углу и обязательно подтвердите сохранение изменений, нажав Save в появившемся диалоговом окне.