TEKMAND Profile Installation
Learn how to properly add a generated fixture from showbackstage.ru to TEKMAND series consoles.
1️⃣ Download Profile File
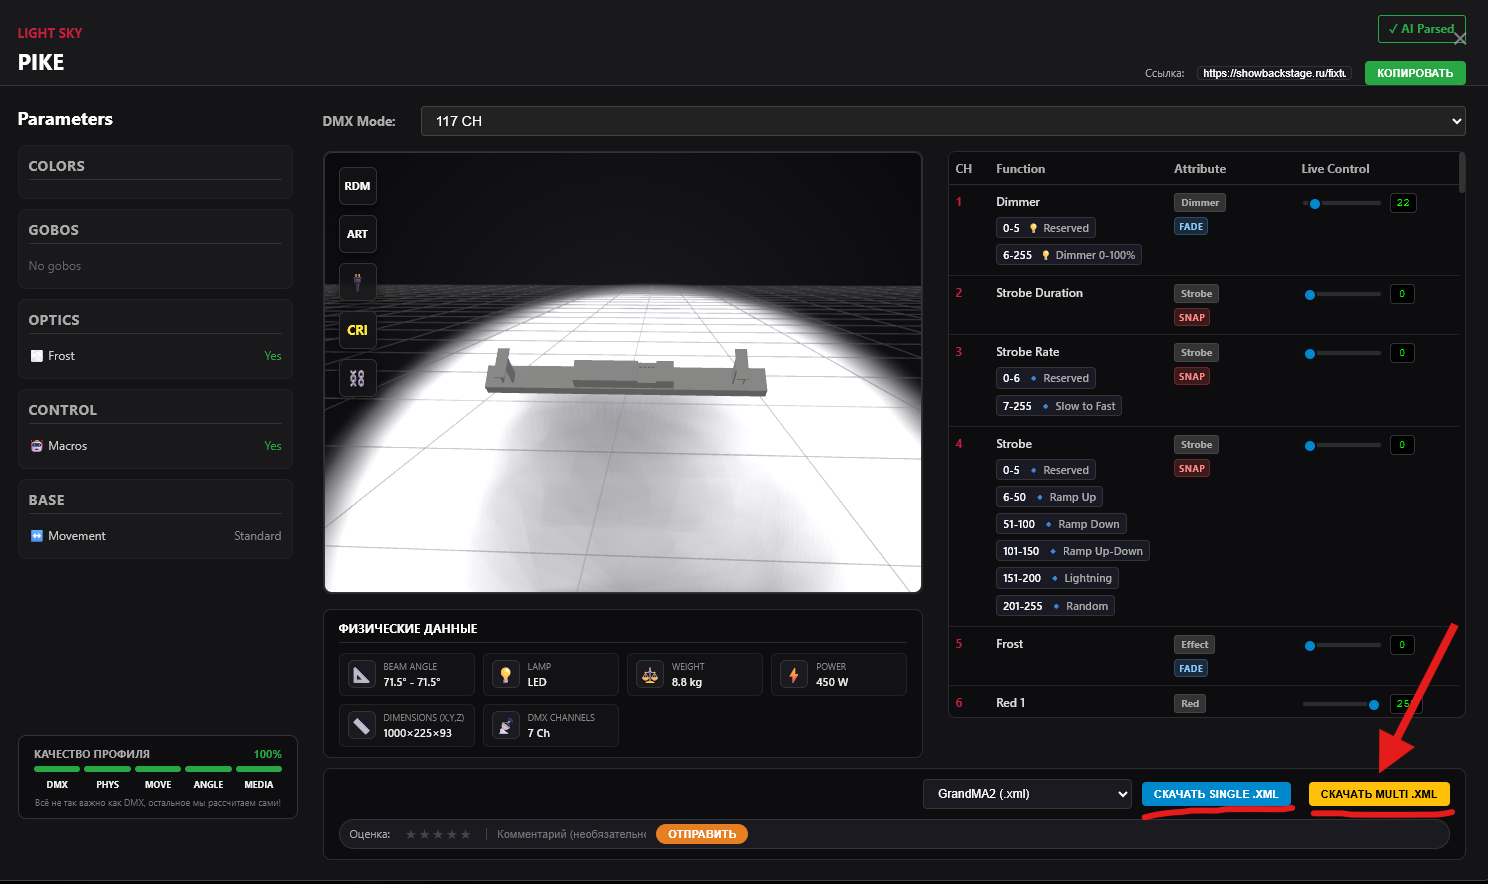
After successful generation and DMX channel verification, select your console TEKMAND (.xmlp) in the modal window and click the download button (Multi Fixture or Single Fixture, depending on the device type).
2️⃣ Move File to Directory
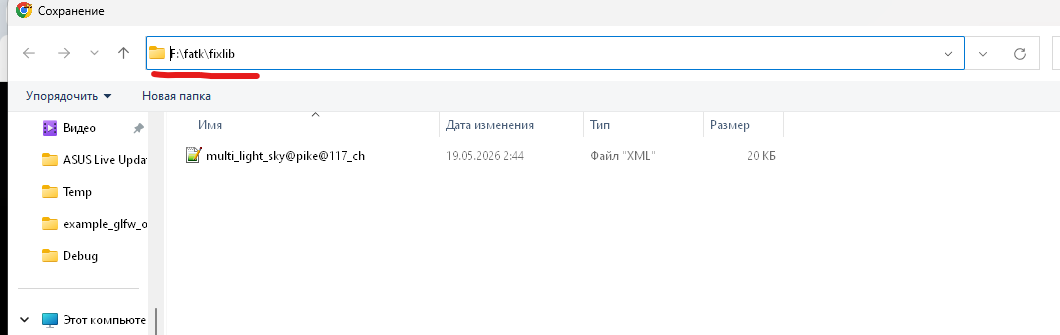
If you are using the PC version (onPC) or have direct access to the console's file system, you can copy the downloaded file directly to the library directory:
Alternatively, you can use a USB flash drive. Create the following folder structure on the flash drive: fatk\fixlib (e.g., F:\fatk\fixlib) and copy the .xmlp file there so the console can see it.
3️⃣ Patch in TEKMAND Software
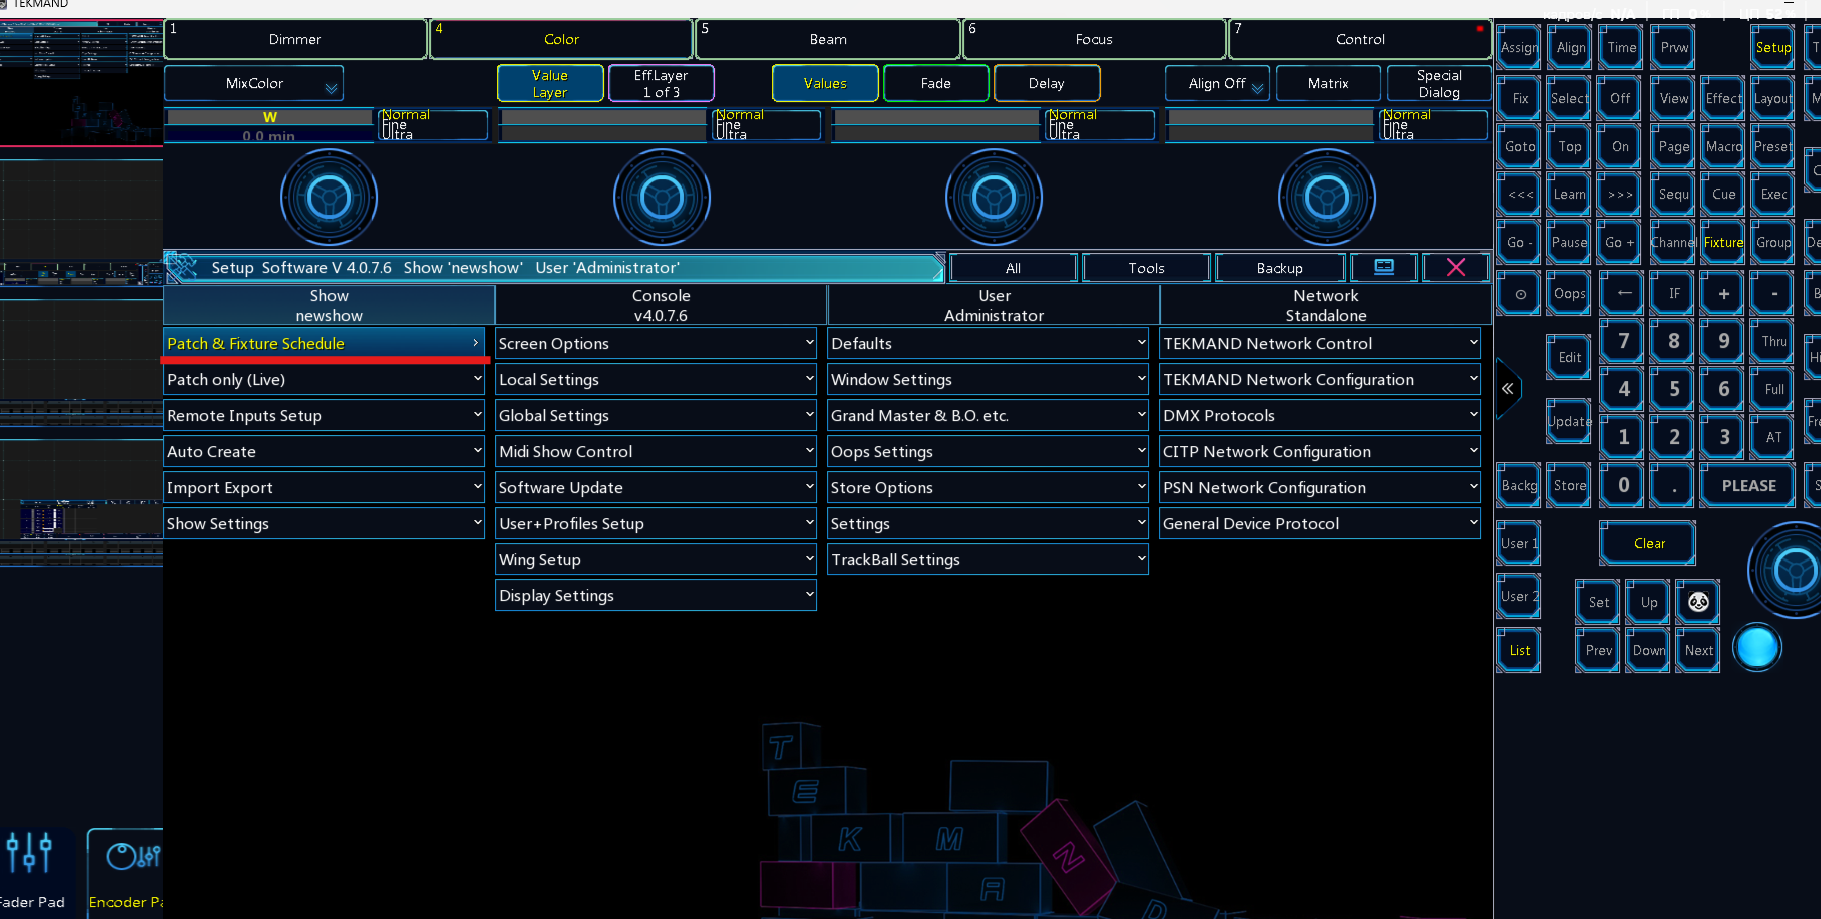
Launch the TEKMAND software. Go to the SETUP menu and open the PATCH & FIXTURE SCHEDULE section.
4️⃣ Adding a New Fixture (From Library)
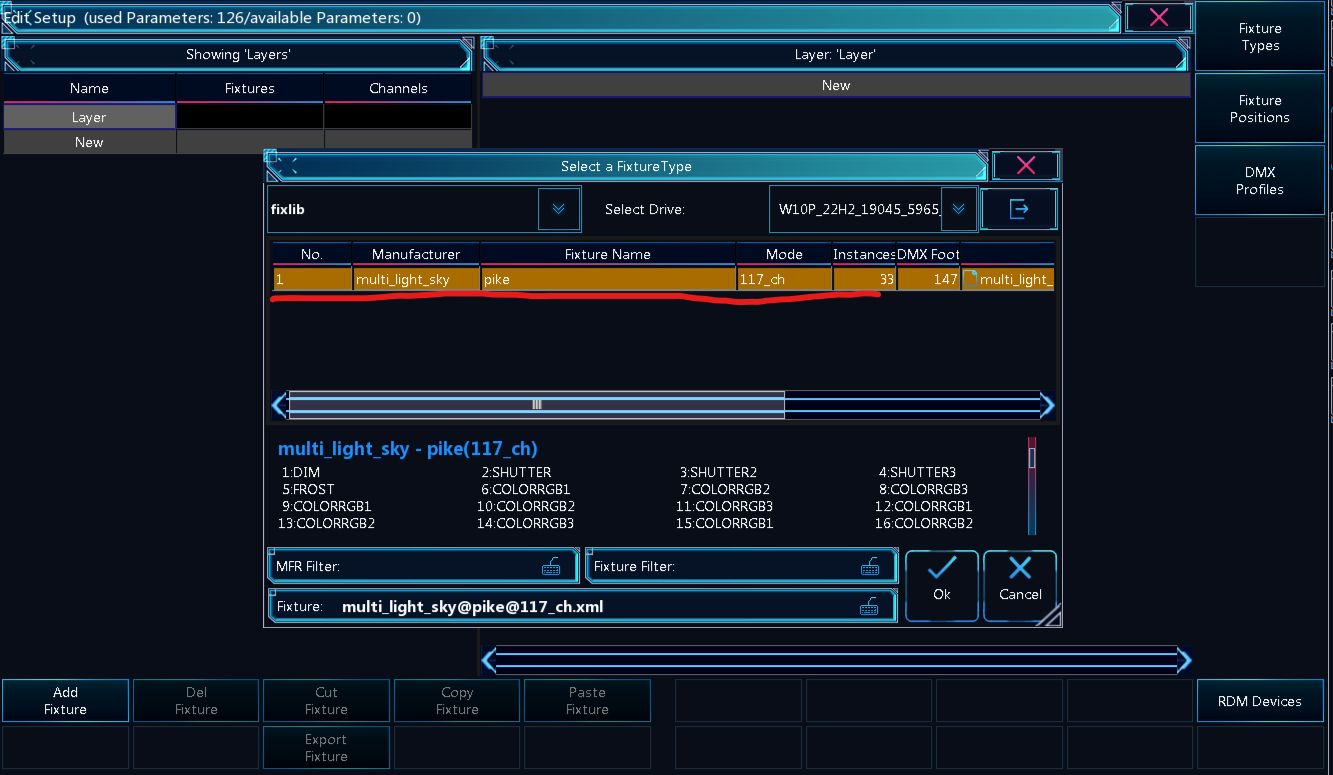
In the patch window, click the NEW button to add a new layer (fixture layer), then click FROM LIBRARY to open the profile library.
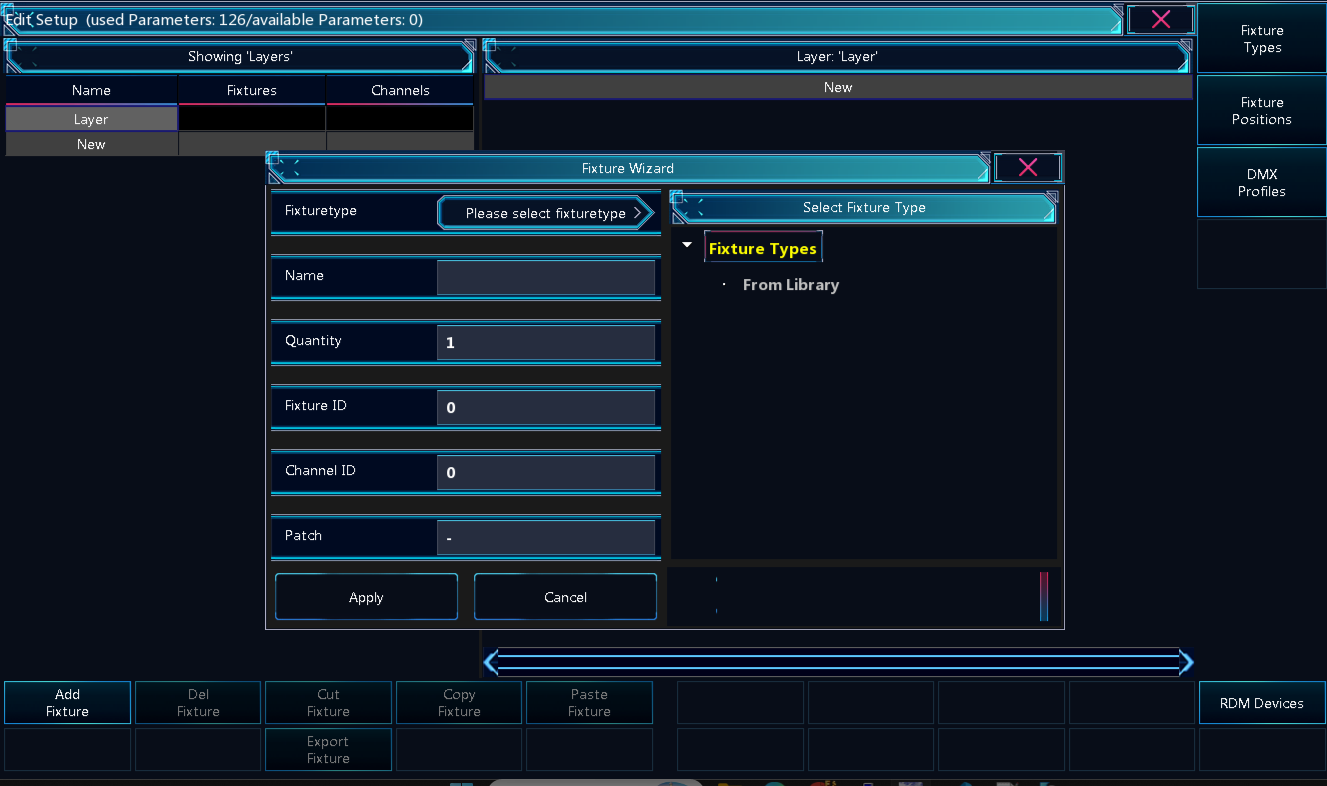
5️⃣ Select Drive and Find Fixture
If you placed the file in the PC folder, you can immediately find the fixture by Manufacturer and name.
If you are using a USB flash drive, switch the source in the top right corner from INTERNAL to your USB drive.
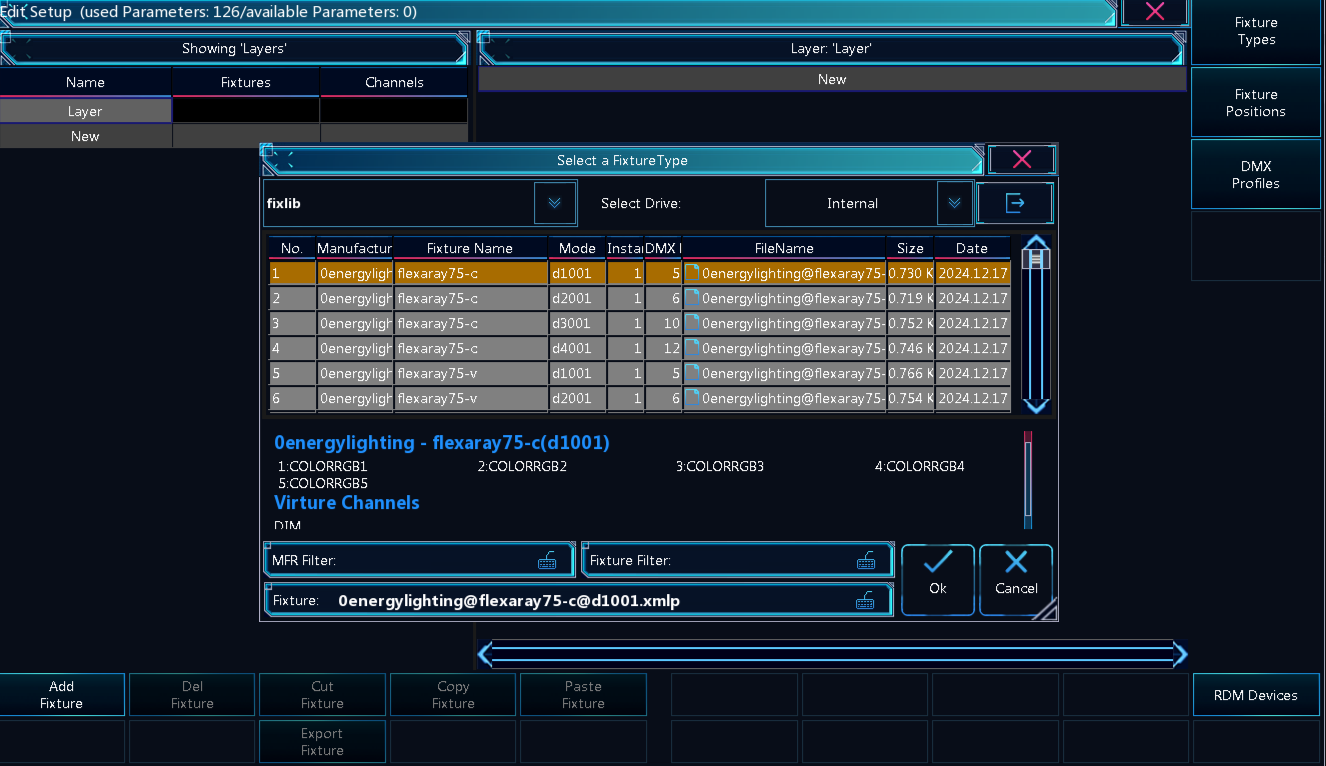
6️⃣ Patch and Finish
When our fixture appears in the list, simply select it. Specify the required quantity of fixtures, the starting address, and they will be added to your show. Installation is complete!